Now also for Mac!
And a new version for Windows.
Speeeeed!
Much faster H.264 and HEVC exports using NVIDIA hardware acceleration. Windows only and requires Pascal or Turing series Nvidia card for HEVC.
Fastest ever!
If you edit using the superfast DANIEL2 codec and export the result either in Daniel2, or on Windows using Nvidia GPU accelerated H.264 or HEVC encoding.
Cinegy Adobe CC 2019
Accelerator Plugin for Windows and Mac
More speed using your favorite tools.
4K, 8K, 10bit+
Of course you can do HD as well, but with 4K and 8K Daniel2 really shows the difference especially when using the Cinegy Player 3 for confidence playback.
Alpha Channel
Need a real industry strength solution that supports Alpha channel and does not eat you alive in terms of storage and performance?
Look no further!
Cinegy Adobe CC 2019 Accelerator Plugin Quick Guide
Cinegy Adobe CC Plugin Configuration (Windows only)
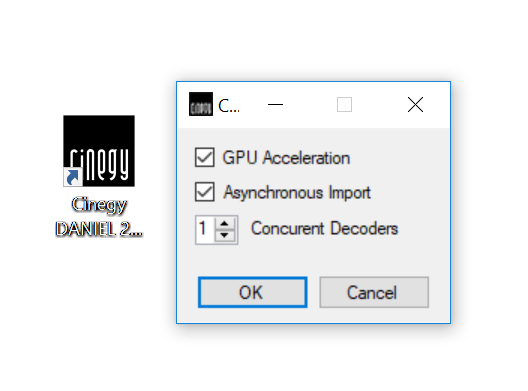
After the installation of the Cinegy Adobe CC plugin for Adobe Premiere (and Adobe Media Encoder) you can configure its settings by double clicking on the desktop icon which then opens a small configuration panel. These settings are only relevant for import and editing using the Cinegy Daniel2 codec format. If you just want to export these do not matter.
There are three options: GPU Acceleration, Asynchronous Import and # of Concurrent Decoders. The default is that all options are all enabled and the number of decoders set to one. By disabling GPU acceleration for import and editing the plugin is switching to CPU mode for handling the Daniel2 format. This means that a NVIDIA GPU card is not required for import or export - as you can also choose CPU based export. The Daniel2 CPU codec is fast. Very fast. On some very powerful machines with many CPU cores the CPU version of Daniel2 is faster than the GPU version. Also, sometimes there is no GPU to be had which now is no problem anymore. Now you can start Adobe Premiere or Media Encoder and Daniel2 MXF files will look like any other media file format the Adobe products handle natively.
Daniel2 Export Settings (Windows & Mac)
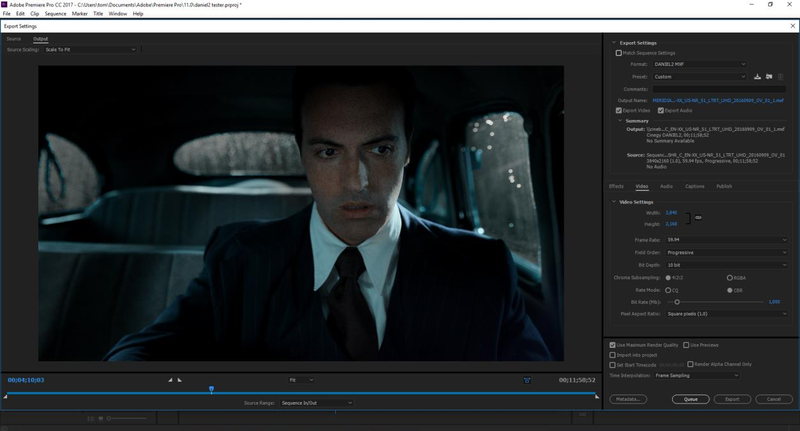
With the installation and configuration complete you can choose the Daniel2 codec as export format as any other format in the export settings.
Daniel2 is by default wrapped inside an MXF OP1A container. This wraps all elements - video, audio, and indexes - all in one easily manageable files. Just like SONY XDCAM or XAVC.
If you only want to export video, uncheck the "Export Audio" selector. Of course you could also just export audio, but for that you don't need a Daniel2 codec.
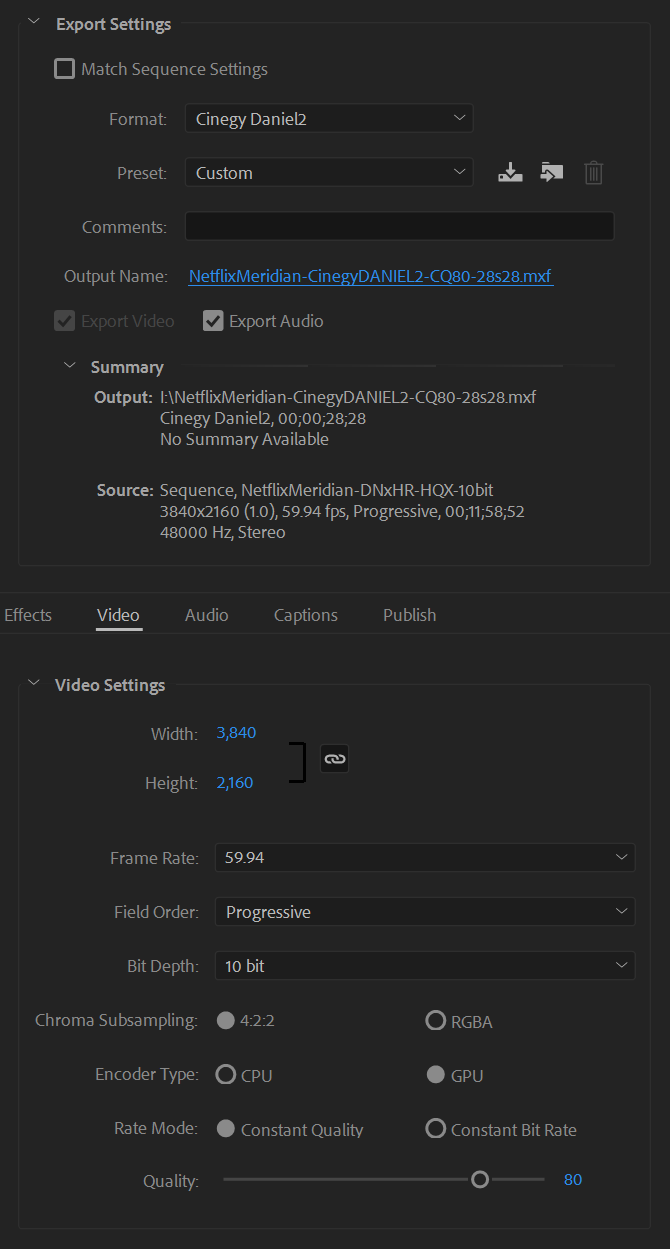
Daniel2 Video Settings
In the Video Settings just set the output values you require. Daniel2 settings can be freely chosen, so this may take some trying to find the best combination for you. We have no fixed profiles. This makes setup a bit more complicated but you get exactly what you want.
Output resolutions and frame rate need no explanation and also the Field Order should be clear. Progressive in this day and age is always preferred, but with HD and below one still faces interlaced video. Bit depth is selectable from 8, 10, 12 or 16 bit. For most cases 10 bit should be enough apart maybe from high-end film production. For some cases also 8 bit maybe be the right choice - e.g. when you know the source is 8 bit, so there is no pint wasting additional bandwidth and storage.
Chroma modes are 4:2:2 (YUV) or RGBA (4:4:4:4). Don't worry if you only want to do RGB (4:4:4), if there is no Alpha channel you are not wasting any space selecting RGBA anyway, as we would detect the absence of the Alpha channel automatically. If you need Alpha channel support RGBA is the choice to make.
The Encoder Type allows you to choose between Daniel2 encoding using the NVIDIA GPU, which of course must be present, or the machines' CPU. Depending on GPU or CPU either of them can be faster. Of course when exporting the source video format(s) may also be encoded and depending on the nature of the codec this will create additional CPU load adding to the general system load.
On a very fast multi-core Intel Xeon machine the CPU may actually beat the NVIDIA GPU in terms of encode power.
The Rate Modes determine the bit rate algorithm used. CQ is Constant Quality which has a changing bit rate depending on the complexity of the picture with the average bit rate defined by the slider or typed in with the value being Mbps. CBR is Constant Bit Rate, meaning the bit rate stays the same as defined by the slider (or typed value) independent of the complexity of the picture and the picture quality may vary unless the rate is set high enough.
Cinegy H.264 Export Settings (Windows only)
For this function to work you should have Adobe CC 2018 or later installed.
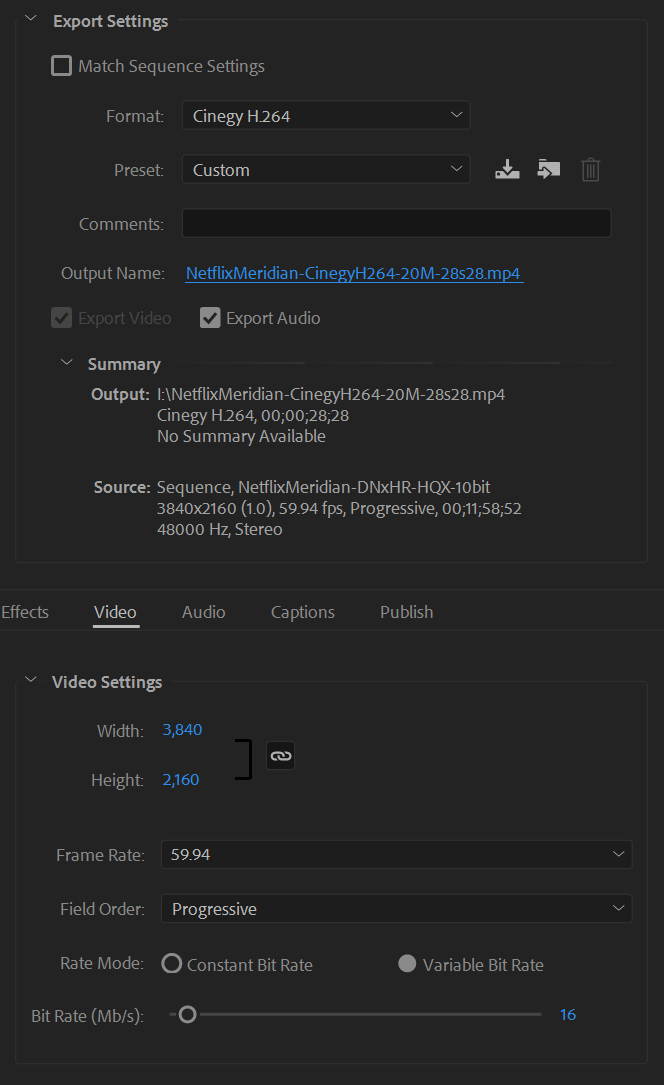
The Cinegy H.264 export settings for now are relatively simple and not very much one can do wrong.
Output resolution defined by width and height, frame rate, field order. In addition we have the "Rate Mode" with choices Constant Bit Rate and Variable Bit Rate with the names explaining pretty much what they do.
Finally there is the slider with the target bit rate in Mbit/s with an numeric entry field beside it.
This H.264 encoder uses the NVIDIA graphics card video compression hardware. If you have no NVIDIA graphics card installed this will not work. It is also advisable to have a recent NVIDIA graphics driver installed for best quality and performance. There is a difference between NVIDIA Geforce consumer graphics cards and NVIDIA Quadro professional graphics cards.
All consumer cards and Quadro cards underneath the M2000 or P2000 are limited in number of simultaneous encode streams that can be generated.
If Adobe Premiere or Media Encoder is the only application doing any encoding that should not be an issue, otherwise export will fail.
The only output wrapper we support at this stage is MP4 which is the most commonly used one for H.264 video.
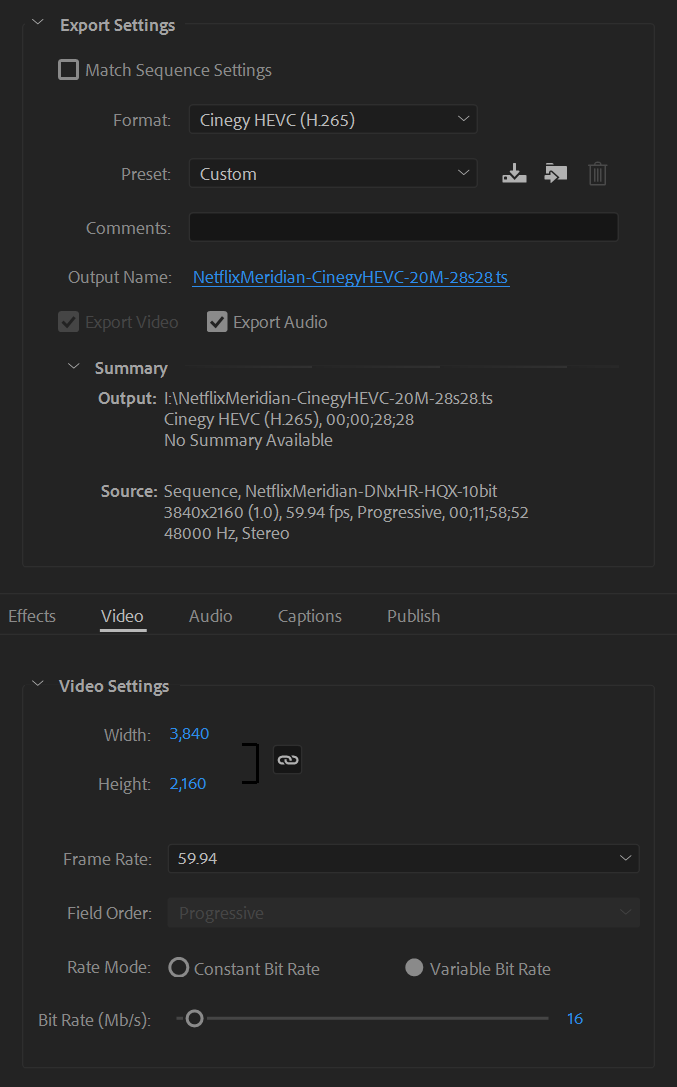
Cinegy HEVC Export Settings (Windows only)
For this function to work you should have Adobe CC 2018 or later installed.
The Cinegy HEVC export settings for now are relatively simple and very similar.
Output resolution defined by width and height, frame rate, field order. In addition we have the "Rate Mode" with choices Constant Bit Rate and Variable Bit Rate with the names explaining pretty much what they do.
Finally there is the slider with the target bit rate in Mbit/s with an numeric entry field beside it.
This HEVC encoder uses the NVIDIA graphics card video compression hardware. If you have no NVIDIA graphics card installed this will not work.
The HEVC export functionality requires a late Maxwell series or any Pascal series NVIDIA card. All GTX 10x0 cards will work as well as all Quadro P-series cards.
It is advisable to have a recent NVIDIA graphics driver installed for best quality and performance. There are differences between NVIDIA Geforce consumer graphics cards and NVIDIA Quadro professional graphics cards.
One difference is that all consumer cards and Quadro cards underneath the Quadro P2000 are limited in number of simultaneous encode streams that can be generated. If Adobe Premiere or Media Encoder is the only application doing any encoding that should not be an issue, otherwise export will fail.
The only output wrapper we support at this stage is .ts (Single Program Transport Stream) which plays fine with the Windows 10 (build 1709 or higher) integrated video player (Open with -> Movies & TV) - amazingly enough it also plays 8K HEVC files.